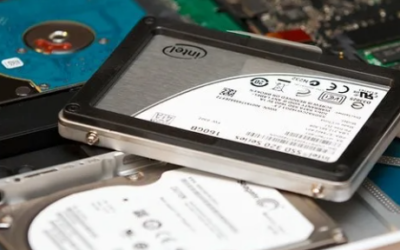
If your computer feels sluggish, upgrading your hard drive to a solid-state drive (SSD) could be the single most effective way to boost performance. SSDs are faster, more reliable, and consume less power than traditional hard drives. Plus, they’re more affordable than ever. In this guide, we’ll walk you through the process of upgrading your hard drive to an SSD.
Why Upgrade to an SSD?
Before diving into the how, let’s talk about the why. Here are the key benefits of SSDs:
- Speed: SSDs can drastically reduce boot times, load applications faster, and improve overall system responsiveness.
- Durability: Unlike HDDs, SSDs have no moving parts, making them more resistant to physical shocks.
- Energy Efficiency: SSDs use less power, which can extend your laptop’s battery life.
- Silent Operation: With no spinning disks or clicking heads, SSDs operate silently.
What You’ll Need
To make the upgrade, you’ll need the following:
- The SSD: Choose an SSD compatible with your system. Common options include 2.5-inch SATA, M.2, or NVMe SSDs.
- A SATA-to-USB Adapter or Dock: For cloning your current drive to the SSD.
- Cloning Software: Many SSD manufacturers provide free tools like Samsung Data Migration or Macrium Reflect.
- A Screwdriver: To open your computer.
- Patience and Time: The process is straightforward but requires careful steps.
Step-by-Step Guide to Upgrading
1. Back Up Your Data
Before starting, back up all your important data to an external drive or cloud storage. While cloning usually preserves all your files, it’s better to be safe than sorry.
2. Choose the Right SSD
- Capacity: Consider an SSD with enough storage for your needs. A minimum of 500GB is a good starting point for most users.
- Form Factor: Ensure compatibility with your device. Check your motherboard’s specifications if you’re unsure.
3. Clone Your Current Drive
Cloning your current drive transfers all your data, settings, and operating system to the new SSD.
- Connect the SSD to your computer using the SATA-to-USB adapter.
- Install and open the cloning software.
- Follow the on-screen instructions to clone your current drive to the SSD. This process may take some time depending on the size of your data.
4. Physically Install the SSD
After cloning, it’s time to replace the old hard drive with the SSD.
- Shut down your computer and unplug it from the power source.
- Open your computer case or laptop bottom panel using the screwdriver.
- Locate the existing hard drive, disconnect it, and remove it.
- Install the SSD in the same slot and secure it in place.
- Close the case or panel.
5. Boot from the SSD
Once the SSD is installed, turn on your computer. It should boot up faster than ever. If your computer doesn’t recognize the SSD, double-check the connections and BIOS settings.
Optional: Optimize Your SSD
- Enable AHCI Mode: Check your BIOS settings to ensure the SSD runs in AHCI mode for optimal performance.
- Turn Off Disk Defragmentation: SSDs don’t need defragmenting, as it can wear them out over time.
- Enable TRIM Support: This helps maintain your SSD’s performance over time.
Final Thoughts
Upgrading to an SSD is a transformative change that can make your computer feel like new. With faster boot times, quicker file access, and improved reliability, it’s an upgrade that’s worth every penny. If you’re unsure about any step, don’t hesitate to seek professional help or consult a detailed video tutorial.
Comments are closed